Every mail client has the basic settings listed below in order to connect to the server. There are also a couple of different method for connecting; we support both POP3 and IMAP. The two protocols are very different. POP3 makes a simple request for new email and then fully downloads all messages on the server unless you choose the option to leave messages on the server - In that case a copy is left on the server and another client can also download it. A good use case for this is if you check your email a lot from you phone, you could have it leave messages on the server but then every day or once a week you could check from a desktop computer and have it NOT leave messages. If you really do want to leave your messages on the server for all time the better option is IMAP -- This is the best choice if you plan to connect to your email from multiple clients such as both your phone and desktop client or even use our web-based client. IMAP is also the best choice if you're always connected. However, there may be space limitations so it's a good idea to manage junk mail and spam more aggressively.
Basic Server Settings
Incoming POP3 Settings
Mail Server: mail.ecropolis.com
PORT: 995 (SSL secured)
Username: Your FULL email address
Password: Your assigned or chosen password
Outgoing POP3 Settings
Make sure to check the box indication your outgoing mail server will require authentication.
Mail Server: mail.ecropolis.com
PORT: 587 (SSL/TLS secured)
Username: Your FULL email address
Password: Your assigned or chosen password
Additional: Use TLS (sometimes a checkbox will be present)
Incoming IMAP Settings
Mail Server: mail.ecropolis.com
PORT: 993 (SSL secured)
Username: Your FULL email address
Password: Your assigned or chosen password
Use SSL
Outgoing IMAP Settings (These are the same for POP3)
Make sure to check the box indication your outgoing mail server will require authentication.
Mail Server: mail.ecropolis.com
PORT: 587 (SSL/TLS secured)
Username: Your FULL email address
Password: Your assigned or chosen password
Additional: Use TLS (sometimes a checkbox will be present)
Adding Your Email to the iPhone App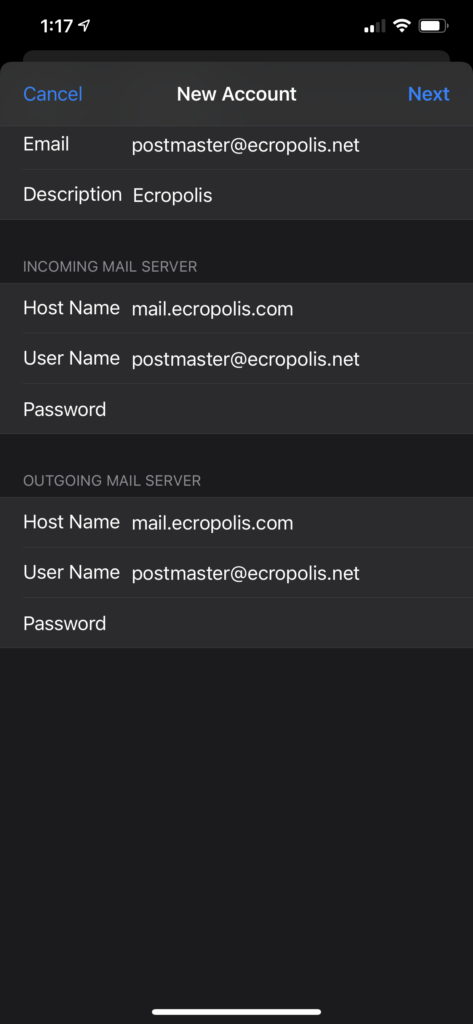
- First go to Settings

- Scroll down to open Mail settings

- Open Accounts
- Open Add Account
- Choose Other
- Choose Add Mail Account
- Enter all of your Email Account information (The description only helps you tell accounts from each other). Click Next
- Top of the screen IMAP is default, but you can toggle to POP. See above opening statement to choose what is best for you.
- Input the account details using the incoming/outgoing details above. You do not have to input the ports because the app will sniff out the typical ports and choose the best and most secure method available for connecting.
Adding Your Email to Outlook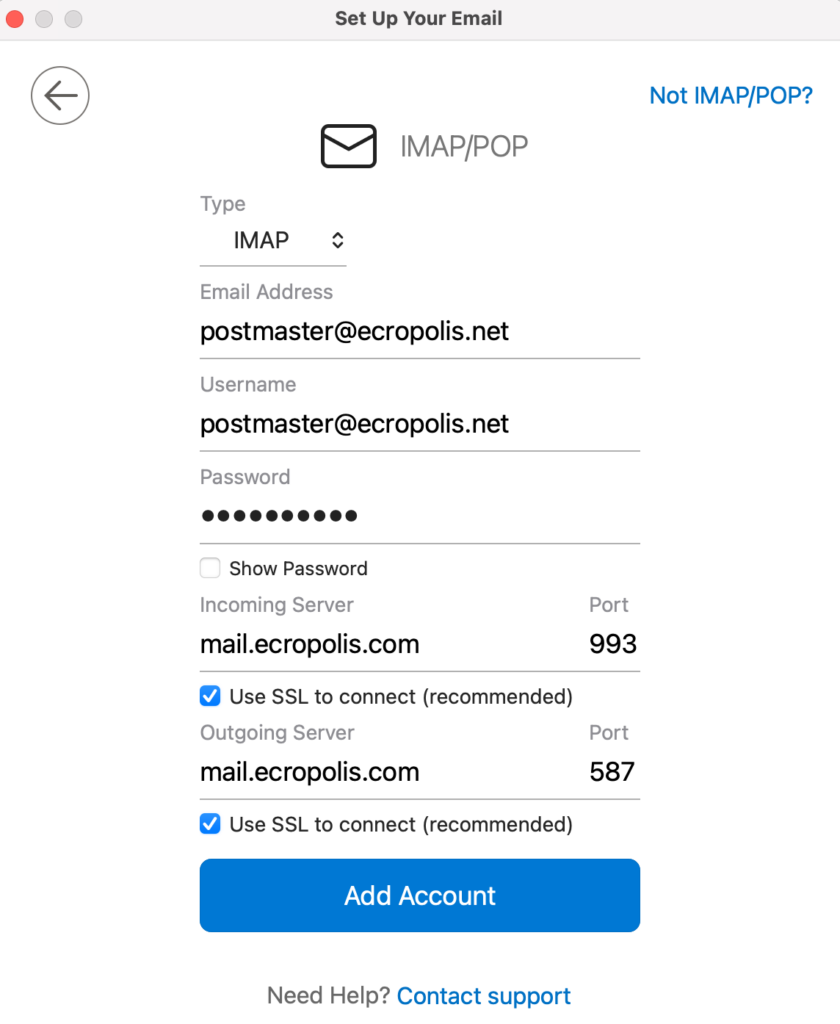
- If opening Outlook for the first time the splash screen will give the option to add the email for the registered account if you're logged in. You will probably choose Other here.
- Input your full email address that you're configuring to use.
- Outlook will not find a provider based on your email address. You will need to select the POP/IMAP option.
- Choose IMAP (defaulted) or POP from the dropdown at the top of the dialog.
- Input the account details using the incoming/outgoing details above.